
Not sure that's a good title, but I'm home for a few days because I've been coughing. I was supposed to run the 'Yon today, but had to cancel. I thought this would be a good time to talk about My System. A venue will ultimately shape the content, this has been written about by David Byrne in his book "How Music Works". As the format by which music was created and listened to changed, so did the kind of music that was made. For example, before there were recordings, listening to music was a small social affair, people would play the piano and sing. Initially, Edison's phonograph came with blank cylinders to record your own music. However, it didn't take long for a performance by an expert performer to be recorded and suddenly there was a market to listen to a specific recording. The nature of music performance and listening changed overnight to adapt to the new technology.
 |
| Fig. 1 The two methods compared |
Pencil and paper games have been beholden to the 8 1/2 x 11 printed format. This format is great for printing and binding to be sold at mass. However, I have found the nature of bound and printed adventures for games makes them inherently linear. I have also run things off a computer, this can alter the "railroad" style of play, but there are other issues. With this in mind I have created my own system. In figure 1 (above), is the traditional version on the left and My System on the right. The traditional version pretty much resides on 8 1/2 x 11 books and paper that live in files. These go into portable file containers. Add to this all the other junk you need, dice, pencils, screens, mats and miniatures and you have a lot of stuff to haul. These plastic bins are an upgrade for my Con gaming, I can almost get everything moved in two trips.
 |
| Fig.2 My System |
I want to be able to carry it all in one go. Call me OCD, but I found by forcing myself to edit down to the essentials clears out weeds in your thinking. There is 3x the information in these boxes than in the two larger bins. This unit is designed to fit in a large soft cloth bag for easy transport. The modular boxes of cards stack like bricks on a wooden base for support. One unit, one trip.
 |
| Fig. 3 Boxes |
Each box has a place for a label, the lid is put underneath to not get lost or take up space. Space in gaming is a big deal, no matter how much you fight it, every flat space in a 25 foot radius will have stuff on it. All "loose" parts of My System are designed to get folded in and not waste any space.
 |
| Fig. 4 Box is also a card holder |
These boxes are custom made to hold two stacks of 4 1/4 x 5 1/2 cards. There is an insert in each so the box can also be used as a file index. This box has 6 complete adventures inside.
 |
| Fig. 5 Half sized boxes for dice |
There are two shorty boxes for dice, markers and writing implements. I was originally going to put this stuff into a standard box, but the depth meant digging through layers. Wasteful and inefficient, especially if you are running at a con. The small units allow stacking (even when open) and allow everything to be visible. I see you shaking your head. Oh, there's more.
 |
| Fig. 6 Cards are 5 1/2 x 4 1/4 |
Sorry, had to get a cough drop. OK, here is what determined all the other sizes, the cards. A couple of years ago I stopped designing my stuff on 8 1/2 x 11 sheets of paper. The initial reason was that it was hard to make changes and slotting it all into the narrative format struck me as restrictive. I looked at standard card sizes, the problem was they are all thin paper and you cant put them through your printer easily.
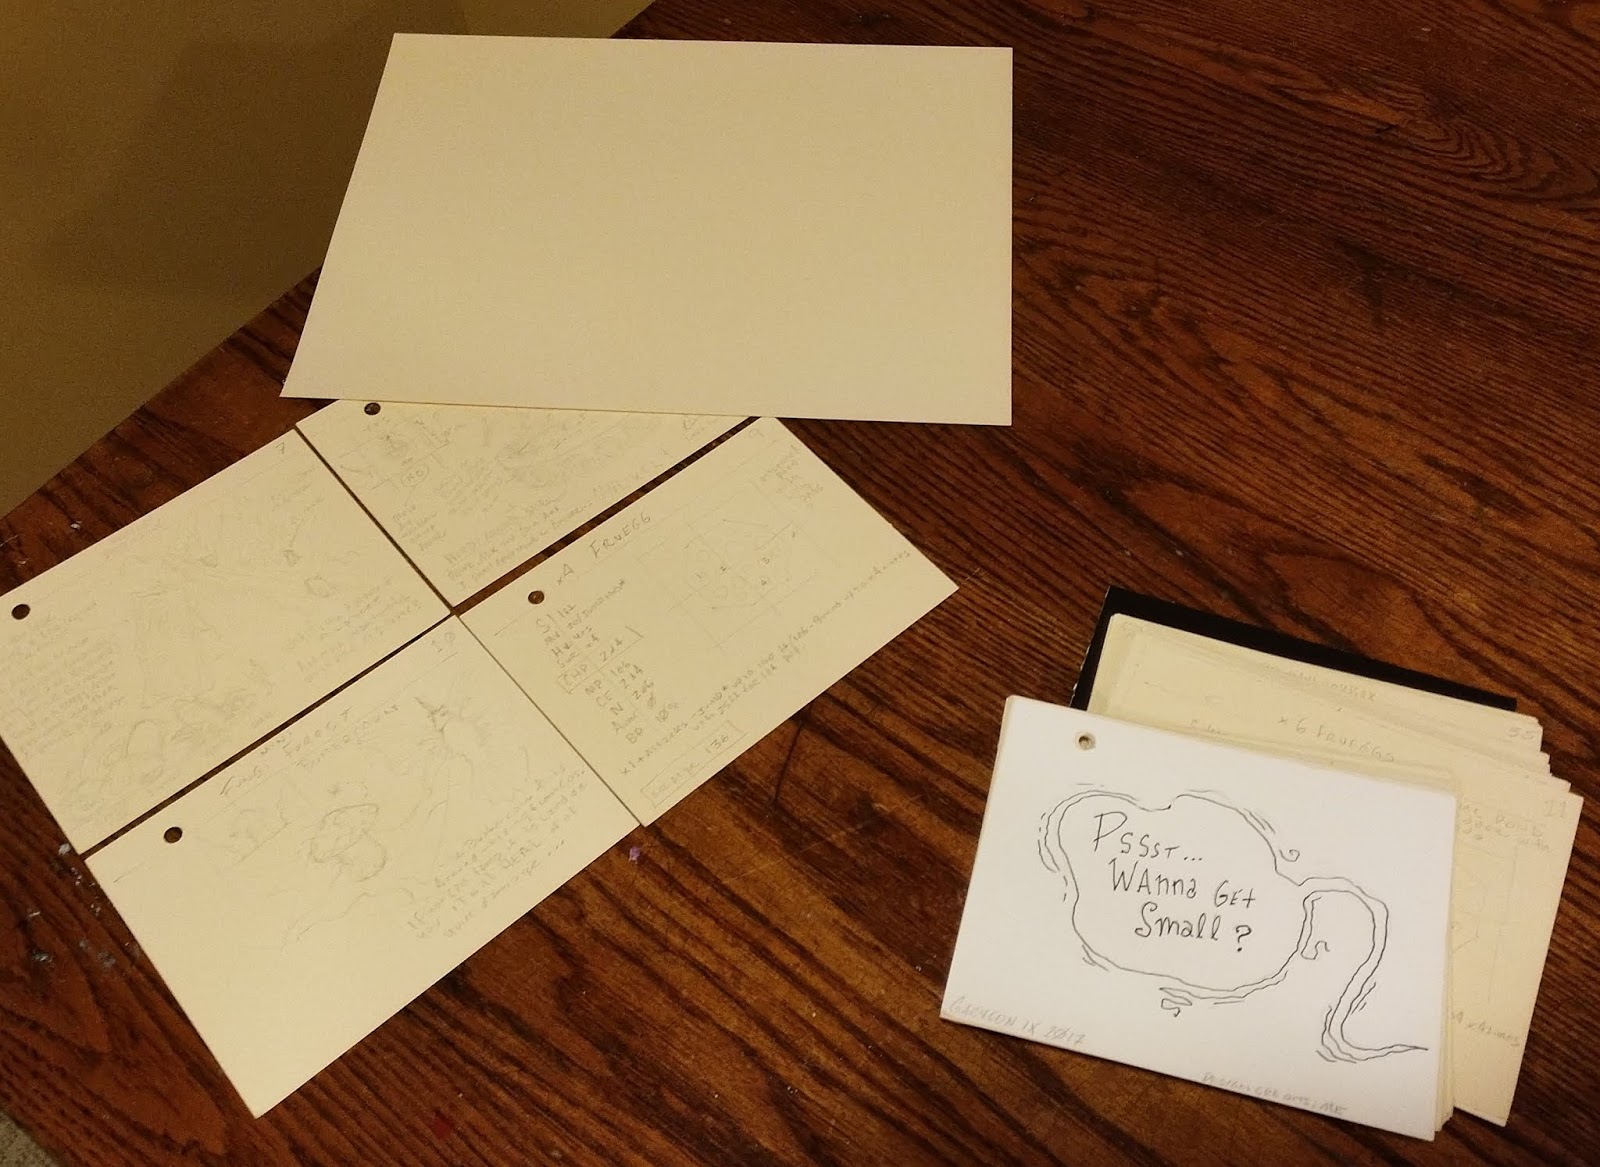 |
| Fig. 7 Card stock source |
I found a source on Amazon for 8 1/2 x 11 card stock sheets (the same used on vanilla file folders). These are cut into quarters to become my basic 5 1/2 x 4 1/4 cards. I use a paper cutter to mass cut them into stacks. It takes a while to go through them, so it's not a big deal. By using these cards I discovered other benefits. First, designing on a small card is a good way to design just one thing. One item, one room, one trap, one event. Very rarely do you need two or more cards. You end up with a system where you know each card is about one idea. Additionally, if you change the idea, rewrite on a new card and swap with the old one. Way easier to make changes. The cards are less intimidating, so it's easier to fill them up. The design process is easier. I do a lot of traveling (train, aircraft), these take up less space so it's much easier to work on a crypt crammed in between other passengers. During play cards can be pulled out as needed for reference. I punch a hole in the upper left corner to hold them together, depending (figure 6, above). The system is meant to be flexible.
 |
| Fig. 8 Base module |
The card board is not strong enough to work in a soft bag, there needed to be a support base. The base is custom made to nest two of the boxes on top. Stuff that is lager than the boxes go in here.
 |
| Fig. 9 Base contents |
The top is clear plastic. Mainly what's in here are my screen and mat. These are all custom built.
 |
| Fig 10. The mat |
The complete mat is dry erase. Each square is 8 x 8 inches. At 1 inch equals 5 feet, this covers 120 x 120 feet. The squares can be rearranged as needed.
 |
| Fig. 11 Ugly markers |
I disdain fancy miniatures. they take up a lot of space and weaken the use of the groups collective imagination. The cubes are the player markers, the wooden lotto discs are creepazoids. You can buy old Lotto games on Ebay for a few bucks.
 |
| Fig 12. Magnetic screen |
I have done much to improve my screen. You really need to think about it's function. Those big fortress like things with charts on them become a barrier between you and the players. My goal is to be as actively engaged as possible at all times. Engagement is the heart of my games. (There are a number of older posts on screens).
 |
| Fig 13. Metal sheet |
This screen has gone thru a lot of revs. The flat parts are sheets of ferrous metal cut to size. The edges and corners are filed down.
 |
| Fig 14. Magnets |
The supports are wood, there are pressed in magnets in various spots.
 |
| Fig 15. Ease of construction |
Building the screen is a snap.
 |
| Fig 16. Simple construction |
Various elements are put together to make a card holder just big enough to keep things hidden. I also found that having two or three "mini" screens worked better than one big one.
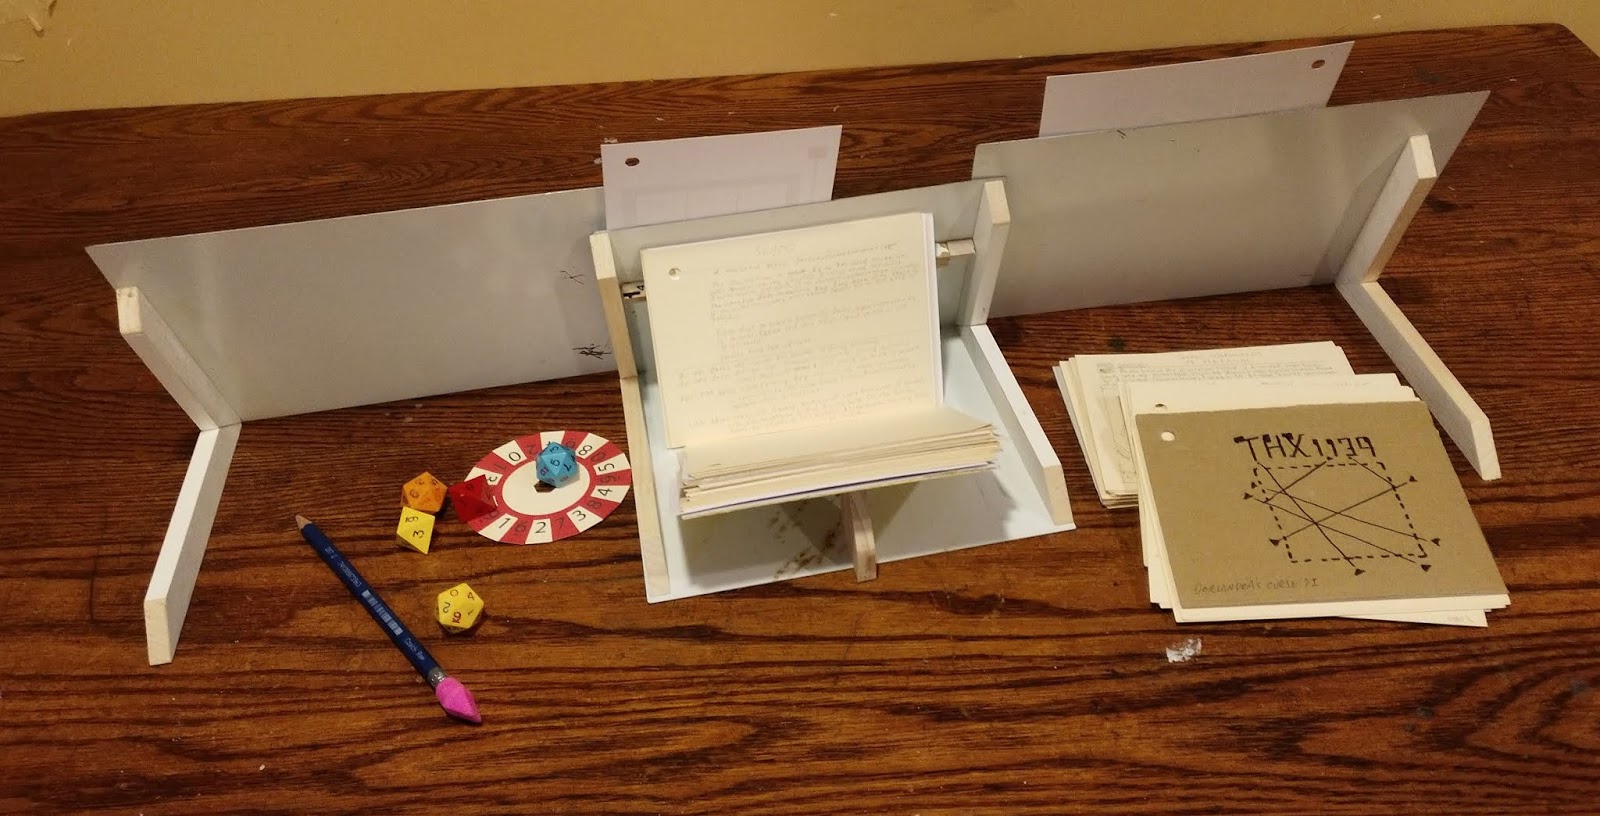 |
| Fig 17. The whole enchilada |
There are two more supports to add on two more panels. This is the Referee's view. Things can be picked up and moved around at will.
 |
| Fig 18. Front |
The player side is basically a big refrigerator. Game aids and pics can be removed from the system and stuck to the front using magnets. I have been using this for the last two years and this system has really changed how I play. Hopefully I'll not be sick soon so I can get back to running some games!
 |
| Fig 19. A game from a few weeks back. Note the SYSTEM in use (lower left) |
No comments:
Post a Comment